
Building this site with Next.js, Docker, and Github
Lately, I've been writing a lot of Next.js applications. I decided to immerse myself deeper by rebuilding my site with it. I don't particularly appreciate tinkering with production code, so this allows me to use every single feature of the framework in my spare time. That way, I'm not looking things up when ripping production code.
In this article, I'll go soup-to-nuts on how I put it together. Hopefully, someone new to development can learn a couple of things.
Domain registration
Yes, we're going pretty deep. If you already know how to register domains, skip ahead.
I'm using CloudFlare as my registrar. I can't say enough good things about their interface, features, CDN, and more. That's a different article. This part is pretty simple.
- Login to CloudFlare
- Under Domain Registration - click "Register Domains"
- Search for the domain and purchase
Source control
Building something is only fun if you can see it in production. If I don't do the CI/CD now, I'm less likely to complete it, as it's pretty easy to build a container and push it to production. Like most people, I use GitHub for source control, so I created a new repository.

Note: At the bottom of the page, you can see that my default branch is "master". That's because my Github account is old, which is the default. Make sure you change that to "main," as the software community collectively decided the default branch should be "main." I later remembered and retroactively updated my branch.
Now, hit the command line and clone the repository.
git clone https://github.com/mattkruskamp/mattkruskamp.social.git
Downloading the base template
I ended up starting with a template. My goal is an immersion into Tailwind / Next.js / MDX, so I don't need to start from nothing. I'm not a designer and don't have much time to work on side projects, so I decided to start with something close to what I wanted and make it my own. Tailwind UI fits that bill. There is enough plumbing and pages to start, but it is also pretty close to the metal. I pay for an account because it lets me quickly prototype concepts without fiddling. Fiddling is the best way to learn but the most expensive way to build software.
The Spotlight template is an excellent place to start.
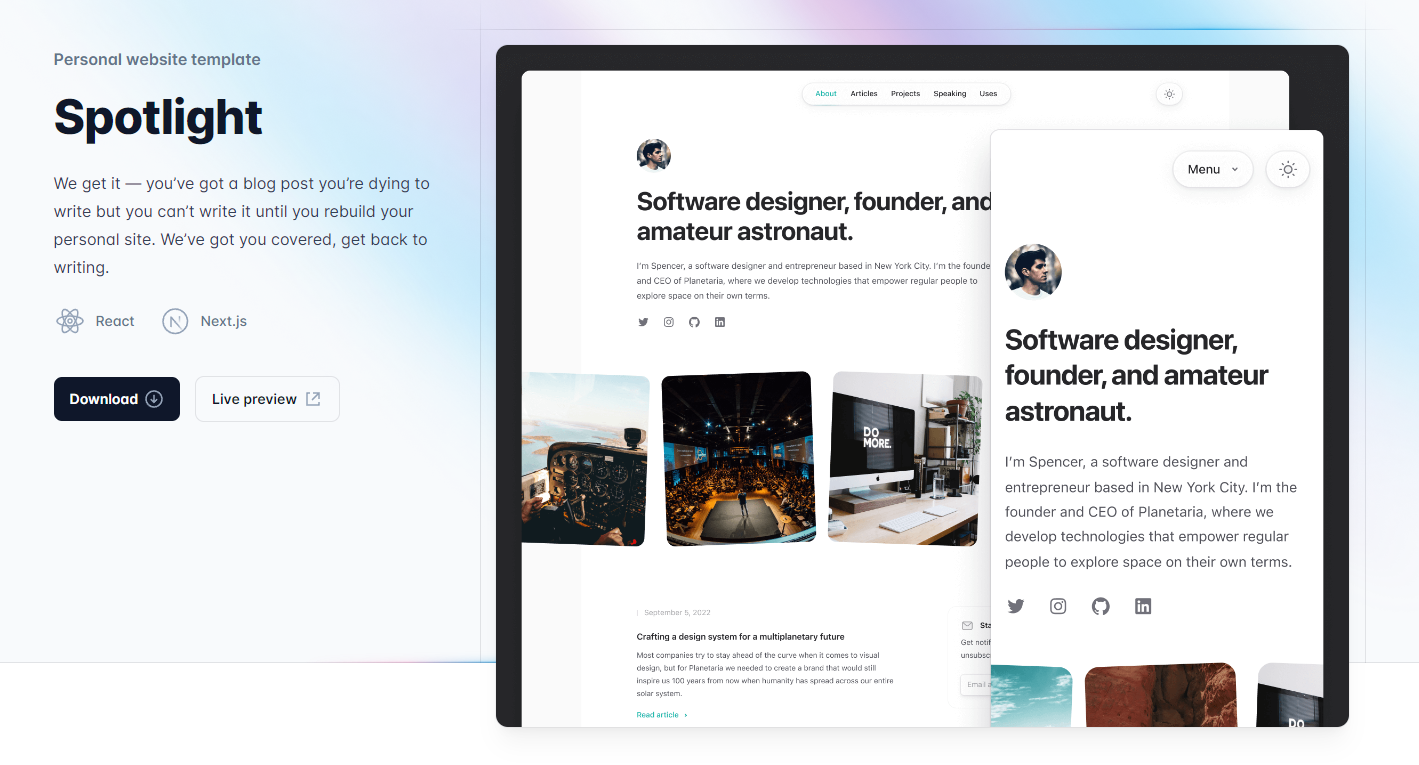
I downloaded the template, extracted the zip file, and copied the TypeScript contents to my source control folder.
Note: This particular template comes with TypeScript and raw JavaScript versions. I have complicated and mixed feelings about TypeScript, but ultimately, I went with it for this project. If anyone is interested, I'll probably write an article at some point about when I should use TypeScript vs. JavaScript.
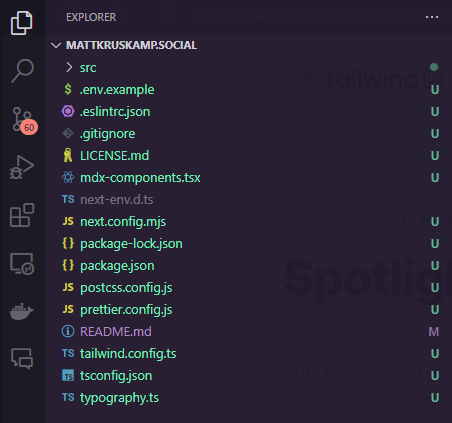
My root source control folder now looks like this:
Verifying everything works
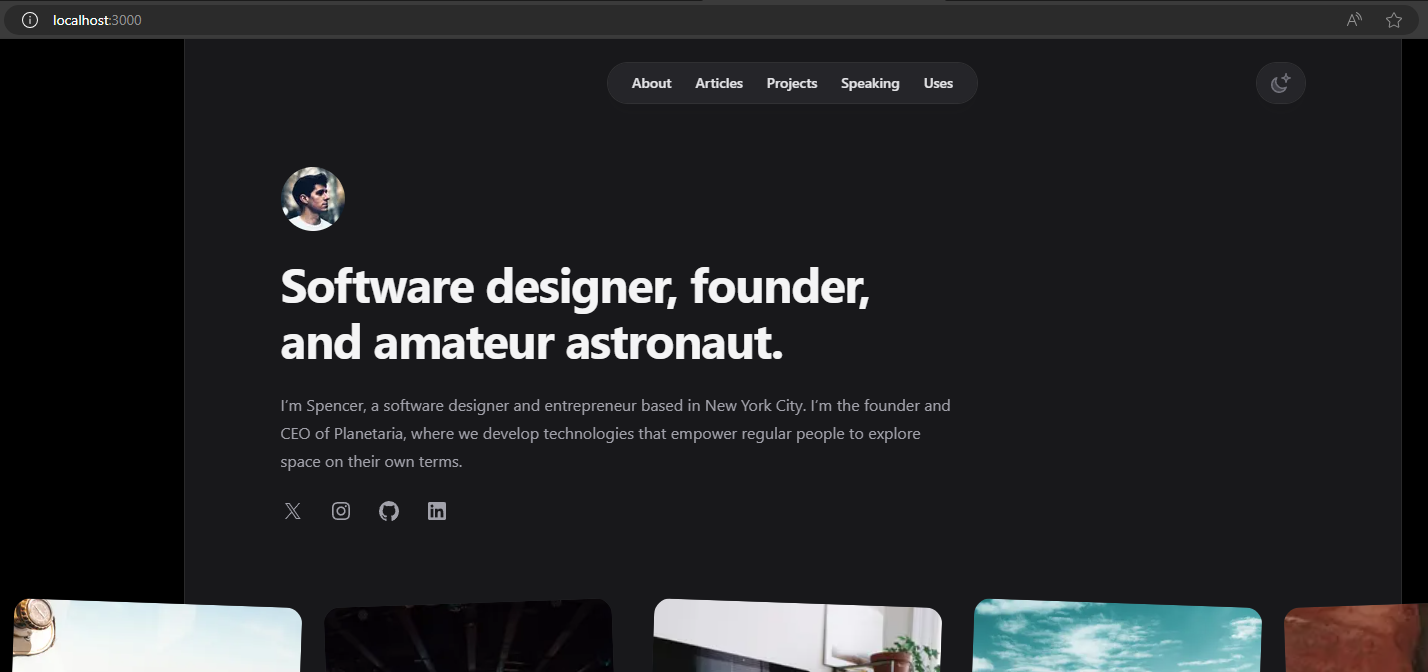
Next, I want to build and run everything to ensure it works. If the prereqs get installed correctly, it's two simple commands.
npm install
npm run dev
Now, I can open a web browser, navigate to http://localhost:3000/ and see it running:

Containerizing the application
I containerize my applications so I can publish a number of different ways. Some would say publish with Edge via CloudFlare or Github, but I like to do things with Kubernetes, switch hosting providers, etc, so having containers for everything lets me move projects around. I started with a Dockerfile from Vercel that Next.js recommended. So, I created a file in my root folder called Dockerfile. I then made some adjustments to the node version, and the template doesn't have a public folder, so I commented that out until I need it.
FROM node:21-alpine AS base

# Install dependencies only when needed
FROM base AS deps
# Check https://github.com/nodejs/docker-node/tree/b4117f9333da4138b03a546ec926ef50a31506c3#nodealpine to understand why libc6-compat might be needed.
RUN apk add --no-cache libc6-compat
WORKDIR /app

# Install dependencies based on the preferred package manager
COPY package.json yarn.lock* package-lock.json* pnpm-lock.yaml* ./
RUN \
  if [ -f yarn.lock ]; then yarn --frozen-lockfile; \
  elif [ -f package-lock.json ]; then npm ci; \
  elif [ -f pnpm-lock.yaml ]; then corepack enable pnpm && pnpm i --frozen-lockfile; \
  else echo "Lockfile not found." && exit 1; \
  fi


# Rebuild the source code only when needed
FROM base AS builder
WORKDIR /app
COPY --from=deps /app/node_modules ./node_modules
COPY . .

# Next.js collects completely anonymous telemetry data about general usage.
# Learn more here: https://nextjs.org/telemetry
# Uncomment the following line in case you want to disable telemetry during the build.
# ENV NEXT_TELEMETRY_DISABLED 1

RUN \
  if [ -f yarn.lock ]; then yarn run build; \
  elif [ -f package-lock.json ]; then npm run build; \
  elif [ -f pnpm-lock.yaml ]; then corepack enable pnpm && pnpm run build; \
  else echo "Lockfile not found." && exit 1; \
  fi

# Production image, copy all the files and run next
FROM base AS runner
WORKDIR /app

ENV NODE_ENV production
# Uncomment the following line in case you want to disable telemetry during runtime.
# ENV NEXT_TELEMETRY_DISABLED 1

RUN addgroup --system --gid 1001 nodejs
RUN adduser --system --uid 1001 nextjs

# COPY --from=builder /app/public ./public

# Set the correct permission for prerender cache
RUN mkdir .next
RUN chown nextjs:nodejs .next

# Automatically leverage output traces to reduce image size
# https://nextjs.org/docs/advanced-features/output-file-tracing
COPY --from=builder --chown=nextjs:nodejs /app/.next/standalone ./
COPY --from=builder --chown=nextjs:nodejs /app/.next/static ./.next/static

USER nextjs

EXPOSE 3000

ENV PORT 3000
# set hostname to localhost
ENV HOSTNAME "0.0.0.0"

# server.js is created by next build from the standalone output
# https://nextjs.org/docs/pages/api-reference/next-config-js/output
CMD ["node", "server.js"]
When building for Docker, the project must build standalone. This is done with a simple config update. Traditionally, the config file would be next.config.js, but this project uses the .mjs extension. Just update the nextConfig constant to have an output of "standalone."
/** @type {import('next').NextConfig} */
const nextConfig = {
  pageExtensions: ['js', 'jsx', 'ts', 'tsx', 'mdx'],
  output: 'standalone',
}
With a standalone application, the images won't optimize unless sharp is installed. This is a quick fix from command-line.
npm i sharp
Most people won't have the pageExtensions property. It came with the template. Finally, I noticed this project didn't have a .env file, which caused a build failure. I created two files—one .env.development for when I'm working on the application.
SITE_URL=http://localhost:3000
NEXT_PUBLIC_SITE_URL=http://localhost:3000
And one .env.production for when the application runs in Docker.
SITE_URL=http://127.0.0.1:3000
NEXT_PUBLIC_SITE_URL=http://127.0.0.1:3000
The ones paying close attention will notice the production config is pointing to a local URL. When the Docker image builds, it builds a production version and uses this configuration file. When we cloud host the application, we will override those variables anyway.
Now, it's time to test. Back to the command line.
docker build -t tester .
docker run -p 3000:3000 tester
This runs the application via Docker. Open a browser and navigate to http://localhost:3000.
It's time to commit the work. I'm not using pull requests until the CI/CD pipeline is configured, because CI/CD is fickle, and there's no features in this repository to protect against.
git add .
git commit -am "feat: added the base project with containerization"
git push origin main
CI/CD with Github Actions
Create a folder .github with a folder inside called workflows. This is where Github looks for Github Actions. I will create three: one for requesting a pull request, one for when code merges into the main branch, and one for pushing to production. If we were not doing a personal site, I would add staging environments, automated testing, etc.
Pull requests
This workflow runs whenever a pull request is created. It simulates a merge with main and builds and tests a version. I'm making a file called 1-pr.yaml. Here's its contents.
name: 1-pr

# This workflow is triggered on pull requests to the main branch.
on:
  pull_request:
    branches: [main]

# Environment variables
env:
  NODE_VERSION: '21'

jobs:
  build:
    runs-on: ubuntu-latest
    steps:
      # Checkout the code. fetch-depth: 0 is so we can
      # check the versioning against the whole codebase. This
      # is is a requirement for the semantic-version action.
      - name: checkout
        uses: actions/checkout@v2
        with:
          fetch-depth: 0

      # Configure Node.js with the version specified in
      # the environment variables.
      - uses: actions/setup-node@v3
        with:
          node-version: ${{ env.NODE_VERSION }}

      # Setup versioning. This will generate a version based
      # on the commit messages and the current version in the tags
      # The version format will change based on what we want to build.
      - name: Generate Version
        id: ver
        uses: paulhatch/semantic-[email protected]
        with:
          branch: main
          major_pattern: 'breaking:'
          minor_pattern: 'feat:'
          version_format: '${major}.${minor}.${patch}-dev-${increment}'
          tag_prefix: ''
          bump_each_commit: false

      # Print the version to the console so we can see it
      # for debugging purposes.
      - name: Show Version
        run: |
          echo "version: ${{ steps.ver.outputs.version }}"

      # Take the version and apply it to the package.json
      - name: Apply Version
        shell: bash
        run: |
          find . -maxdepth 1 -type f -name "package.json" -exec sed -i "s/\"version\": \"[0-9]*\.[0-9]*\.[0-9]*\"/\"version\": \"${{ steps.ver.outputs.version }}\"/g" {} \;

      # Install the dependencies
      - name: Install
        run: npm install

      # Build the project
      - name: Build
        run: npm run build

      # Check to make sure we're not breaking any rules
      - name: Lint
        run: npm run lint
The comments should explain what this file is doing.
The next file is auto-building the project when something actually merges into the main codebase. It will build the actual Docker container. If I were in a professional environment, I would publish a development version of the docker image, but that is unnecessary as I'm the only developer. It will just build, so I can verify it works.
name: 2-dev

# This workflow is triggered on pushes to the main branch.
on:
  push:
    branches: [main]

# Environment variables
env:
  REGISTRY: ghcr.io
  IMAGE_NAME: ${{ github.repository }}

jobs:
  docker:
    runs-on: ubuntu-latest
    steps:
      # Checkout the code. fetch-depth: 0 is so we can
      # check the versioning against the whole codebase. This
      # is is a requirement for the semantic-version action.
      - name: checkout
        uses: actions/checkout@v3
        with:
          fetch-depth: 0

      # Setup versioning. This will generate a version based
      # on the commit messages and the current version in the tags
      # The version format will change based on what we want to build.
      - name: Generate Version
        id: ver
        uses: paulhatch/semantic-[email protected]
        with:
          branch: main
          major_pattern: 'breaking:'
          minor_pattern: 'feat:'
          version_format: '${major}.${minor}.${patch}-dev-${increment}'
          tag_prefix: ''
          bump_each_commit: false

      # Print the version to the console so we can see it
      # for debugging purposes.
      - name: Show Version
        run: |
          echo "version: ${{ steps.ver.outputs.version }}"

      # Take the version and apply it to the package.json
      - name: Apply Version
        shell: bash
        run: |
          find . -maxdepth 1 -type f -name "package.json" -exec sed -i "s/\"version\": \"[0-9]*\.[0-9]*\.[0-9]*\"/\"version\": \"${{ steps.ver.outputs.version }}\"/g" {} \;

      # Build the actual docker image
      - name: Build Docker Image
        shell: bash
        run: |
          docker build . -t ${{ env.REGISTRY }}/${{ env.IMAGE_NAME }}:${{ steps.ver.outputs.version }}
The final file is my actual push to production. This will execute manually, so I am basically forcing a push to production. In a big environment, I would re-tag the stage image and deploy it to create consistency with the builds. In this case, we're building an entirely new container and pushing it to production.
name: 3-prod

# This workflow is triggered manually.
on: workflow_dispatch

# Environment variables
env:
  DOCKER_IMAGE: 'registry.digitalocean.com/myrepo/mattkruskampsocial'

jobs:
  publish:
    runs-on: ubuntu-latest

    steps:
      # Checkout the code. fetch-depth: 0 is so we can
      # check the versioning against the whole codebase. This
      # is is a requirement for the semantic-version action.
      - uses: actions/checkout@v2
        with:
          fetch-depth: 0

      # Setup versioning. This will generate a version based
      # on the commit messages and the current version in the tags
      # The version format will change based on what we want to build.
      - name: Generate Version
        id: ver
        uses: paulhatch/semantic-[email protected]
        with:
          branch: main
          major_pattern: 'breaking:'
          minor_pattern: 'feat:'
          version_format: '${major}.${minor}.${patch}'
          tag_prefix: ''
          bump_each_commit: false

      # Print the version to the console so we can see it
      # for debugging purposes.
      - name: Show Version
        run: |
          echo "version: ${{ steps.ver.outputs.version }}"

      # Take the version and apply it to the package.json. Not
      # nessessary as we're versioning with Docker, but I like
      # to know the internal files are versioned correctly.
      - name: Apply Version
        shell: bash
        run: |
          find . -maxdepth 1 -type f -name "package.json" -exec sed -i "s/\"version\": \"[0-9]*\.[0-9]*\.[0-9]*\"/\"version\": \"${{ steps.ver.outputs.version }}\"/g" {} \;

      # Build two images, one with the version and one with the latest tag
      - name: Build container image
        shell: bash
        run: |
          docker build . -t ${{ env.DOCKER_IMAGE }}:${{ steps.ver.outputs.version }} -t ${{ env.DOCKER_IMAGE }}:latest

      # Install tools required to push the image to the registry
      - name: Install doctl
        uses: digitalocean/action-doctl@v2
        with:
          token: ${{ secrets.DIGITALOCEAN_ACCESS_TOKEN }}

      # Log in to the registry. Extend the expiry to 10 minutes
      # to give us time to push the image.
      - name: Log in to DigitalOcean Container Registry
        shell: bash
        run: |
          doctl registry login --expiry-seconds 600

      - name: Push image to DigitalOcean Container Registry
        shell: bash
        run: |
          docker push ${{ env.DOCKER_IMAGE }}:${{ steps.ver.outputs.version }}
          docker push ${{ env.DOCKER_IMAGE }}:latest

      # Create a release tag in Github so that
      # we can track the releases. This is also required
      # to create the appropriate tag for versioning.
      - name: Create GitHub release
        uses: actions/create-release@v1
        with:
          name: v${{ steps.ver.outputs.version }}
          tag: ${{ steps.ver.outputs.version }}
          token: ${{ secrets.RELEASE_TOKEN }}
          release_name: Release ${{ steps.ver.outputs.version }}
          commit: ${{ github.sha }}
          prerelease: false
There are a couple more things we need to set up here. I'm pushing this Docker image to a Digital Ocean Container Registry instead of the Github Packages Registry. I'm doing this because Digital Ocean can pick up on the latest changes and auto-refresh the website. There are a couple of secrets in there: DIGITALOCEAN_ACCESS_TOKEN and RELEASE_TOKEN. We need to create the DIGITALOCEAN_ACCESS_TOKEN secret using credentials from Digital Ocean.
The Digital Ocean Access Token
I already had a container registry setup in Digital Ocean. I just went to https://cloud.digitalocean.com/account/api/tokens and clicked "Generate New Token."
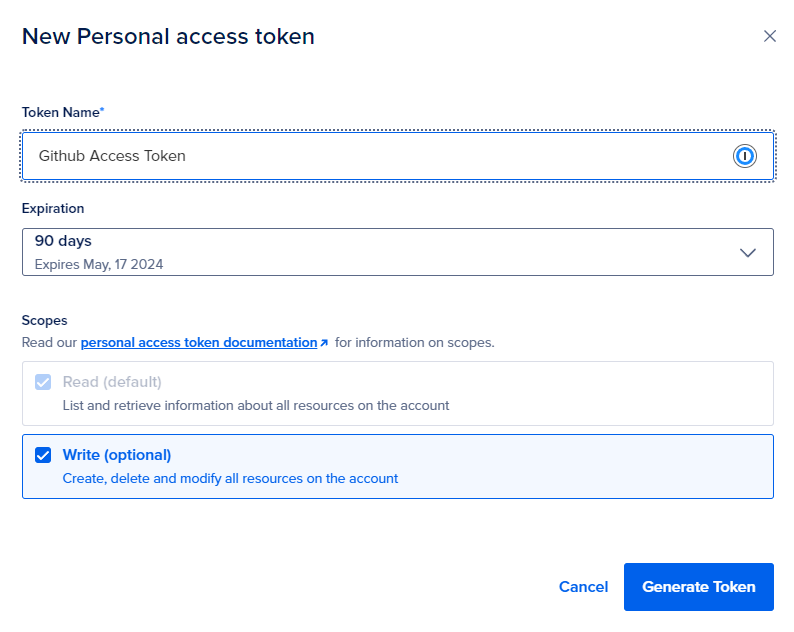
Copy the token, and head back to the GitHub repository. At the top, click Settings, then under Security, click Secrets and Variables. Then click Actions and click New Repository secret.
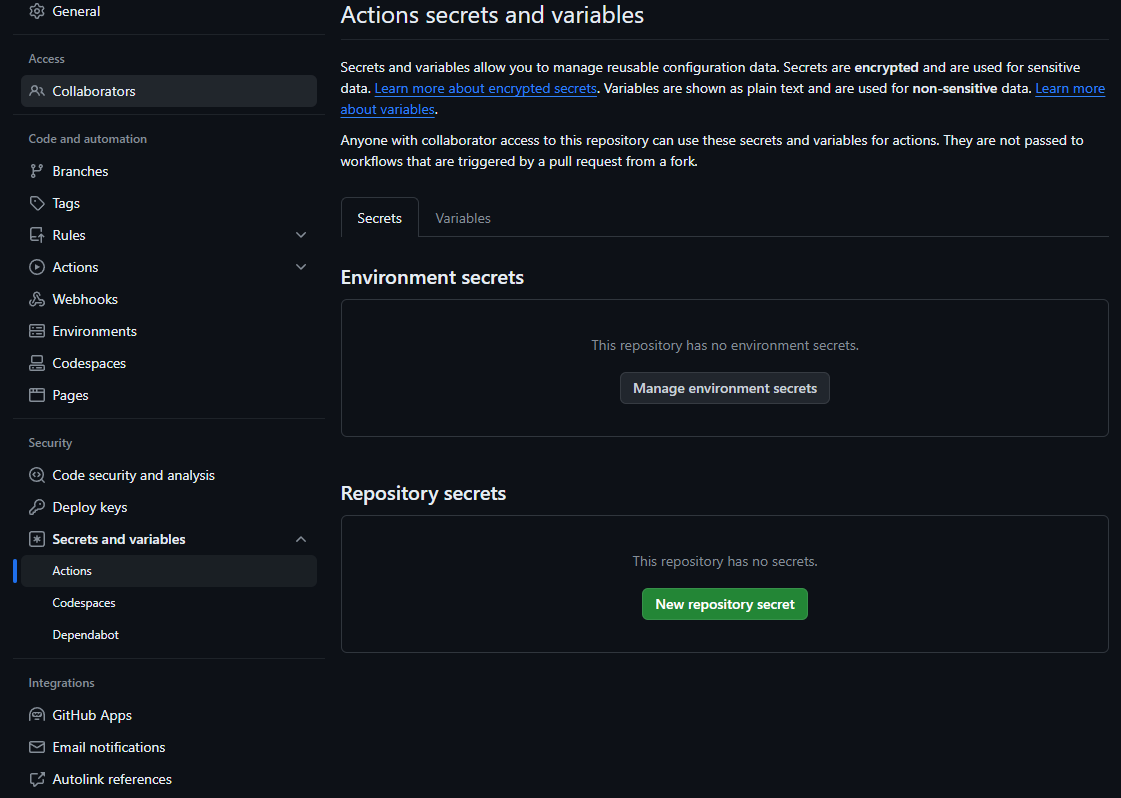
Under name, I entered DIGITALOCEAN_ACCESS_TOKEN, and under Secret, I pasted the token I copied from Digital Ocean.
Now I can test it all. A quick commit of everything like before:
git add .
git commit -am "feat: added continuous integration"
git push origin main
First, I tested the pull requests workflow by creating a branch.
git checkout -b pr-test
Next, I changed the README.md file (It doesn't matter what changes) and committed it.
git commit -am "doc: updated README with test information"
git push -u origin pr-test
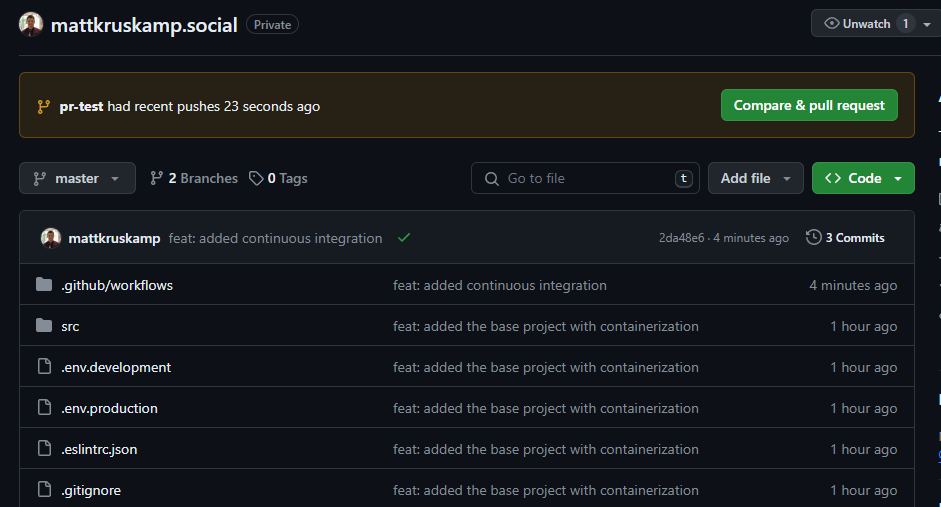
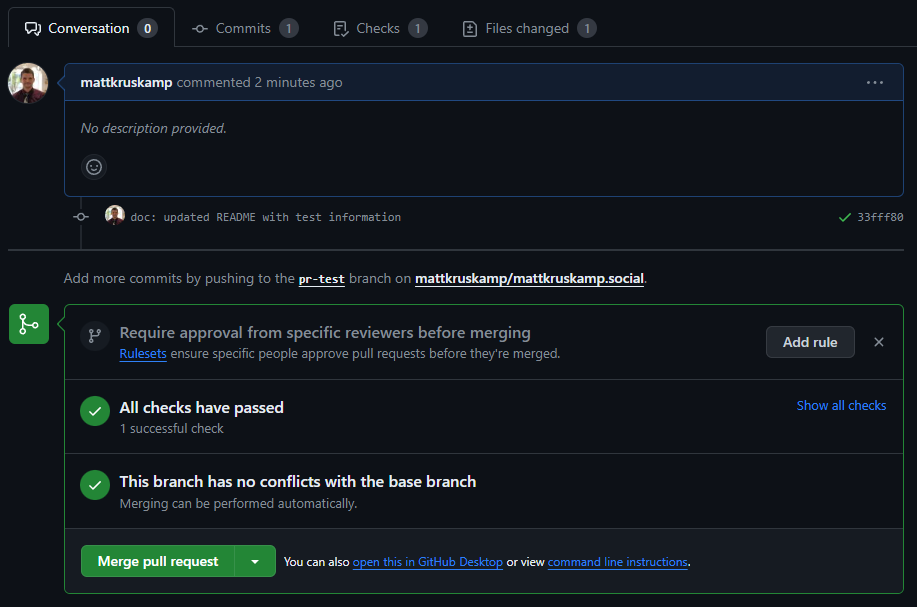
I went back to the GitHub repository, and it knew I wanted to create another pull request.
I clicked Compare & pull request to see the details.
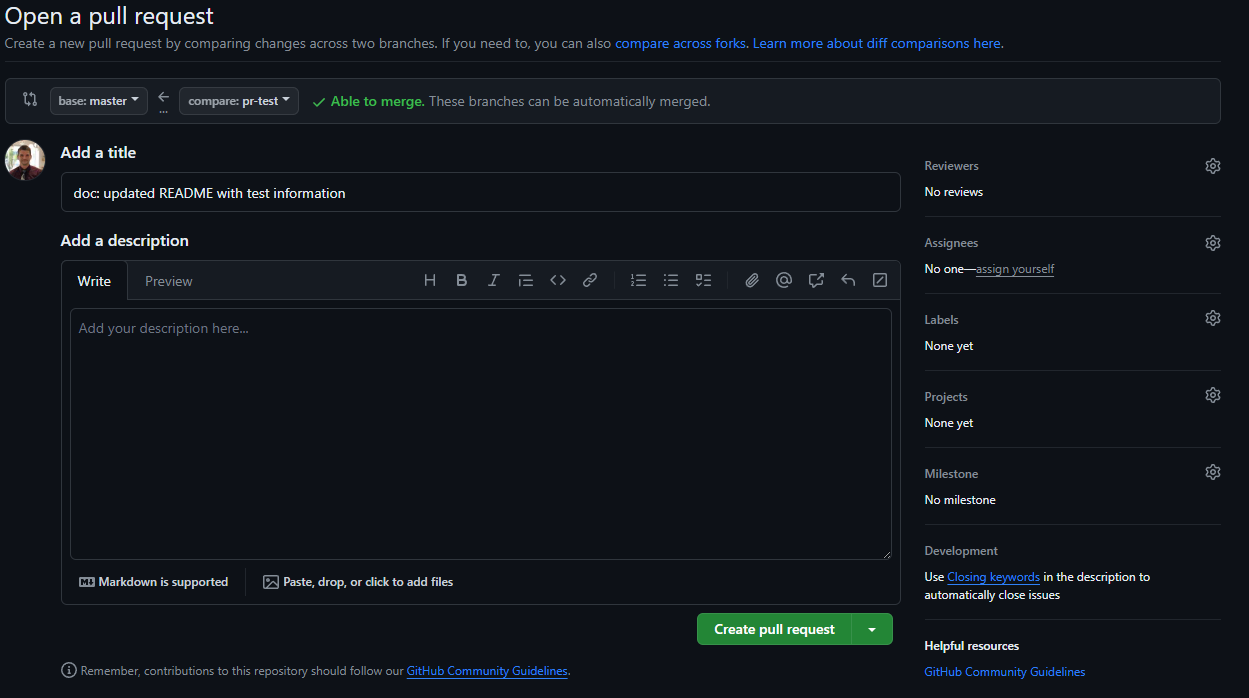
Note: Ignore the
masterbase. I updated the branch tomainafter this screenshot.
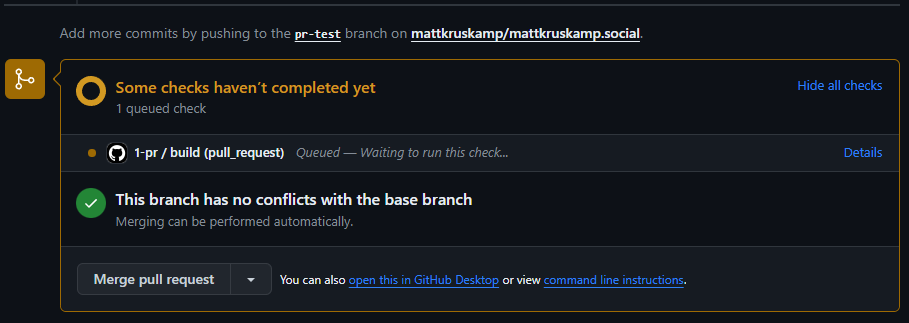
I clicked details to watch for errors. Upon success, I merged the pull request.
This merges all the source code into the main branch. I clicked the Actions tab at the top to watch that run.

Now, for the scary part. I clicked the 3-prod workflow and ran it, which builds and pushes the application to the Digital Ocean container registry.
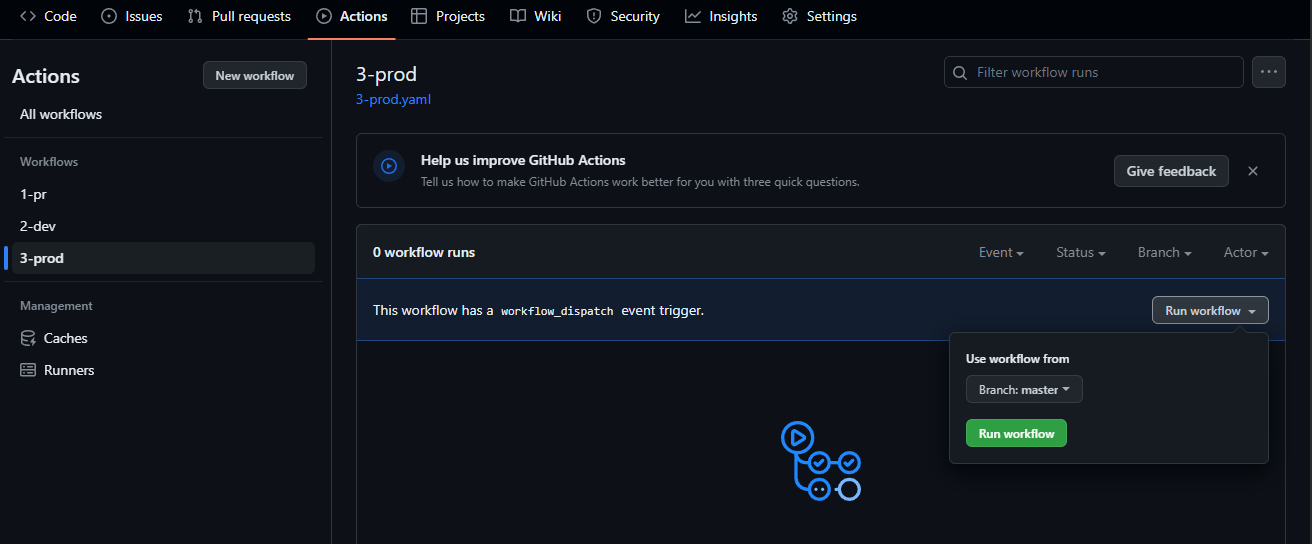
I watched it build to check for issues. I ran into a misspelling (it's rare to have CI/CD work the first time, in my experience), fixed it, and did it again until Github Actions were completed successfully. If you're following along, you won't see these problems because I fixed the configs before I posted them.
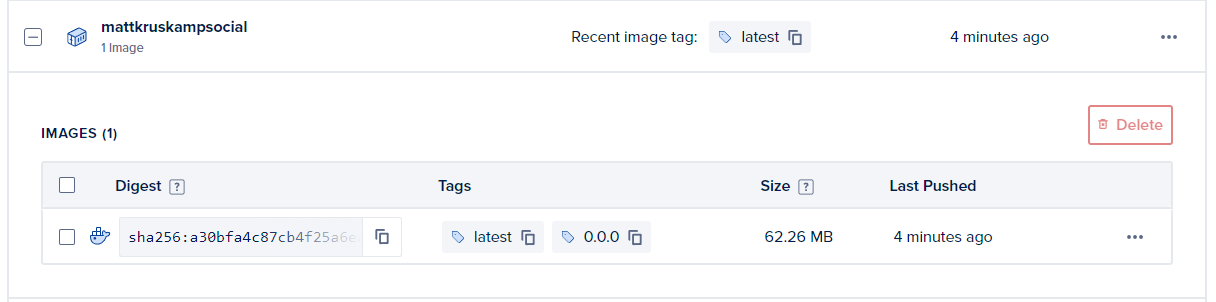
Then, I logged back into Digital Ocean and checked my registry https://cloud.digitalocean.com/registry to ensure the images were there.
Hosting in production
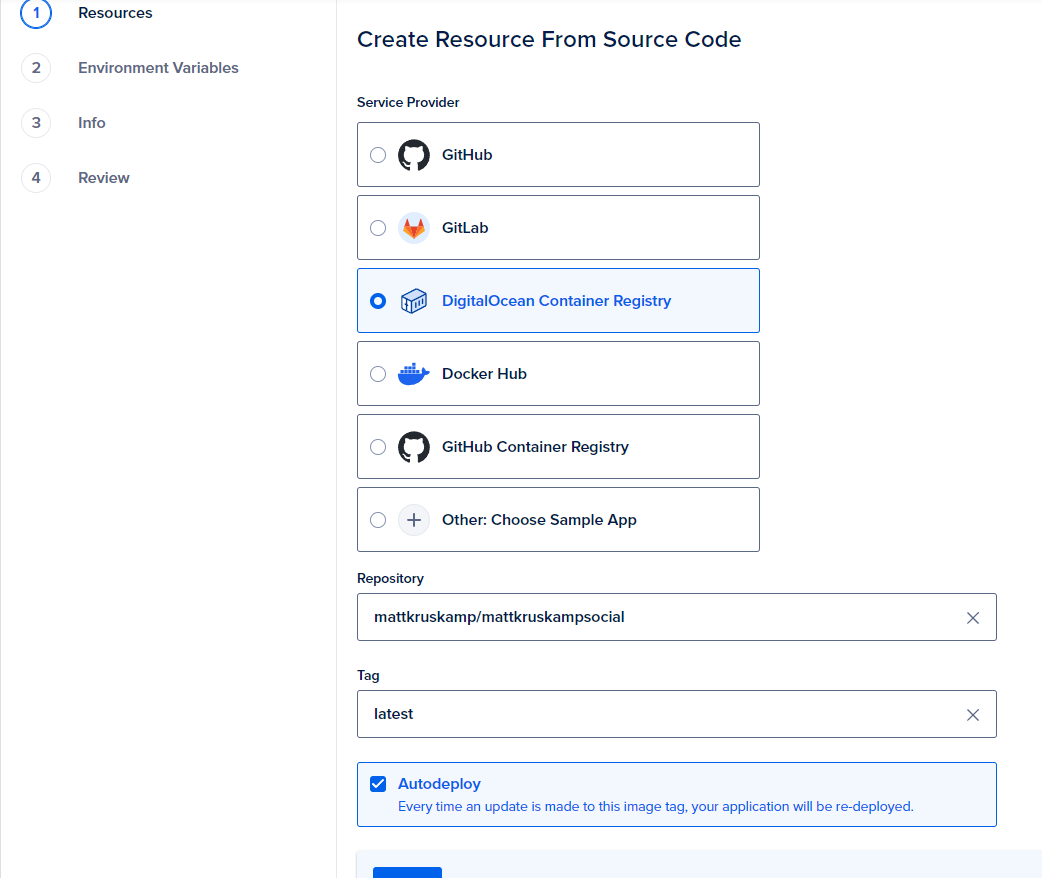
Now, it was time to host the docker image and see it work! I went to Digital Ocean's apps section https://cloud.digitalocean.com/apps and clicked Create App.

I selected the Digital Ocean Container Registry, my repository, the latest tag, and Autodeploy so that whenever I run the prod workflow, it will just push to production.
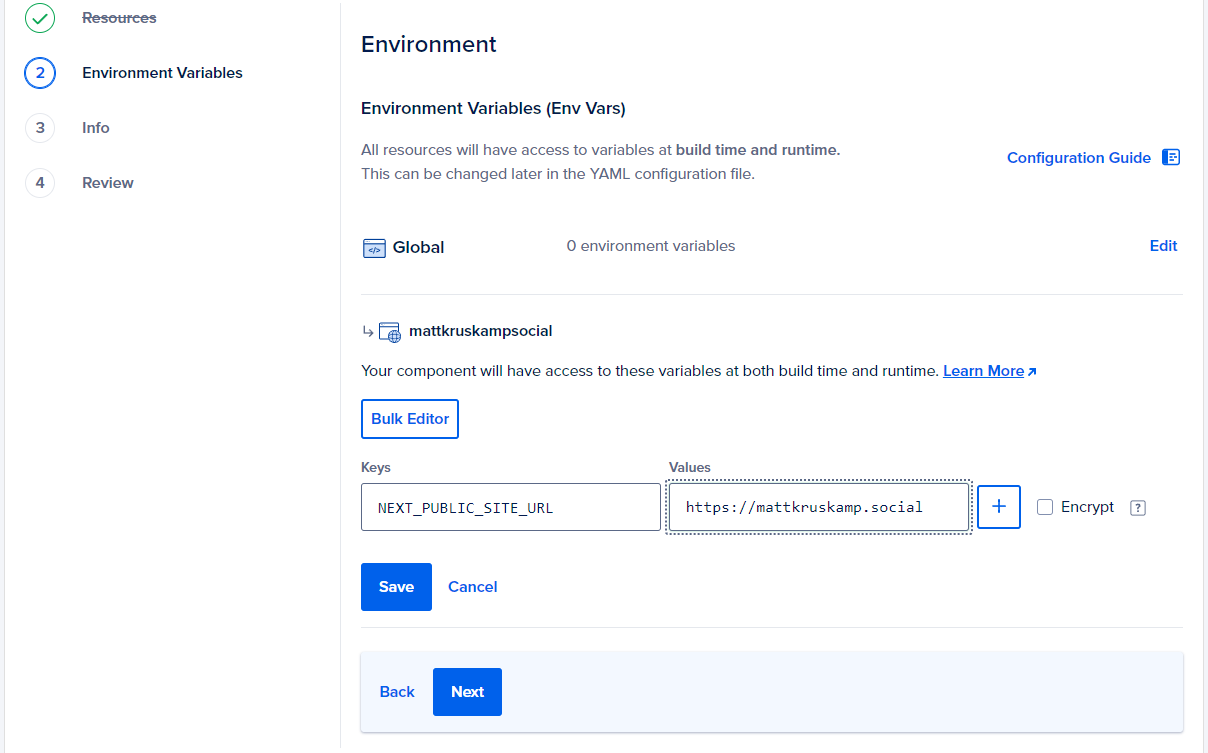
It then asks which plan to use. I went with Pro and used two containers for redundancy. Under environment variables, I'm overriding that previous NEXT_PUBLIC_SITE_URL variable with the final destination.
Then, I clicked next until I could create the resource. Once Digital Ocean completed the deployment, I had a link to check it live.
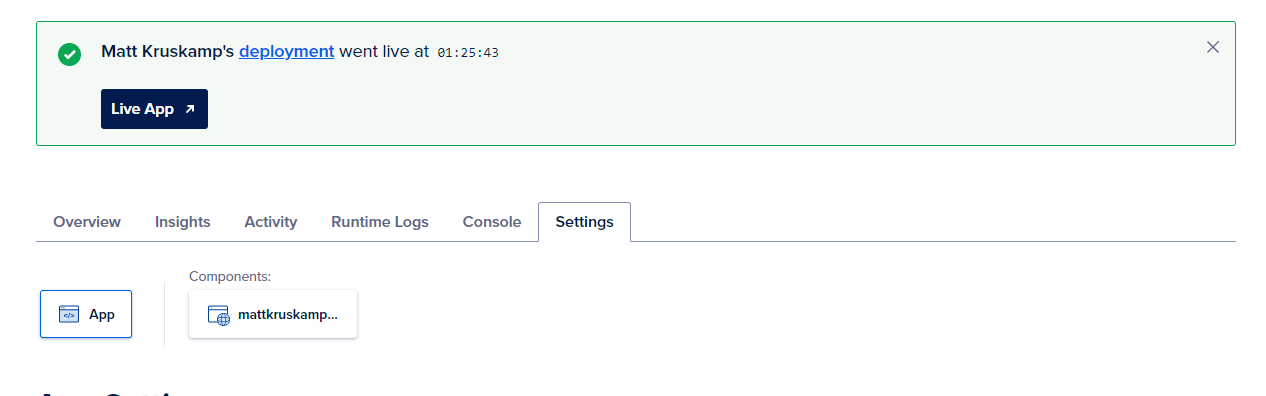
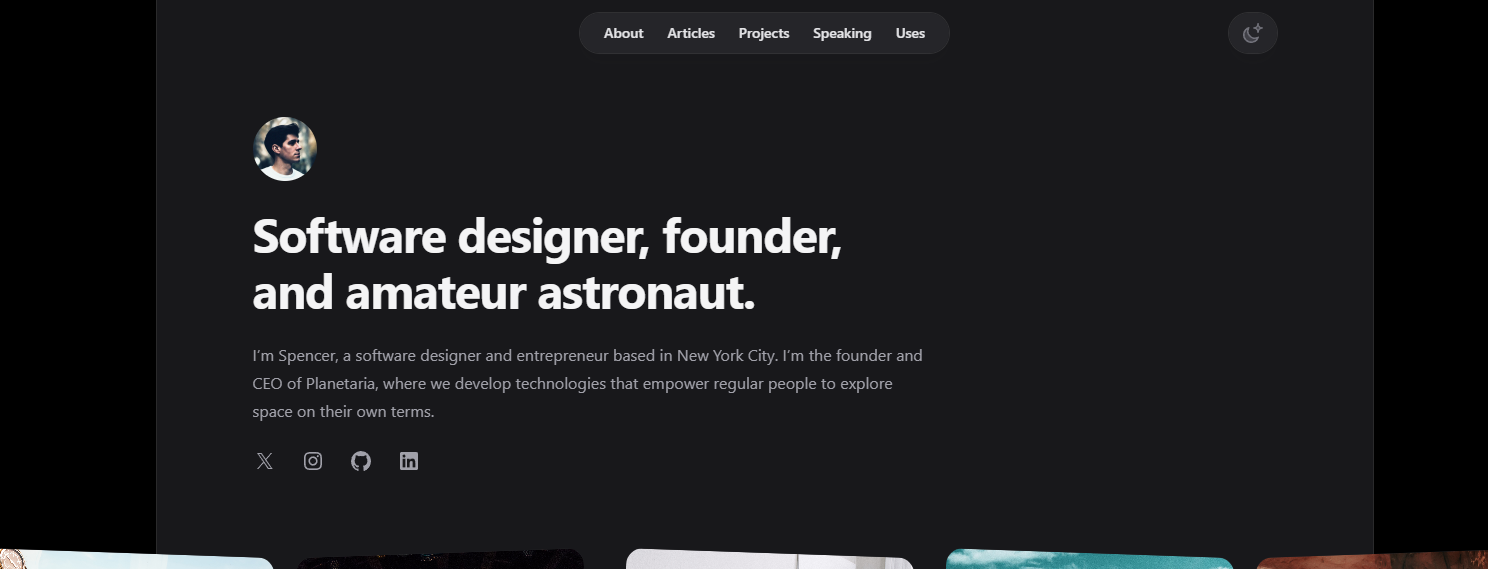
Then tada! I could see the app:
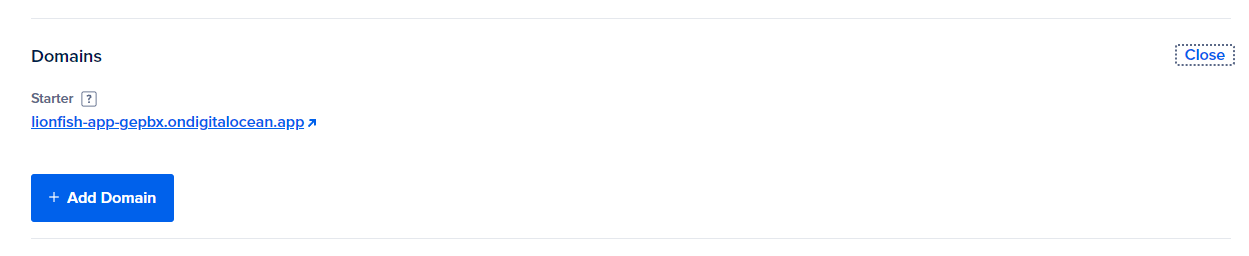
DNS
That's awesome, but we have a final step: expose the application to the internet using the correct URL—DNS. So, under the app settings, there's a section called Domains. I clicked the edit button and added a domain.
I typed the domain name in and clicked the "You manage your domain" section.
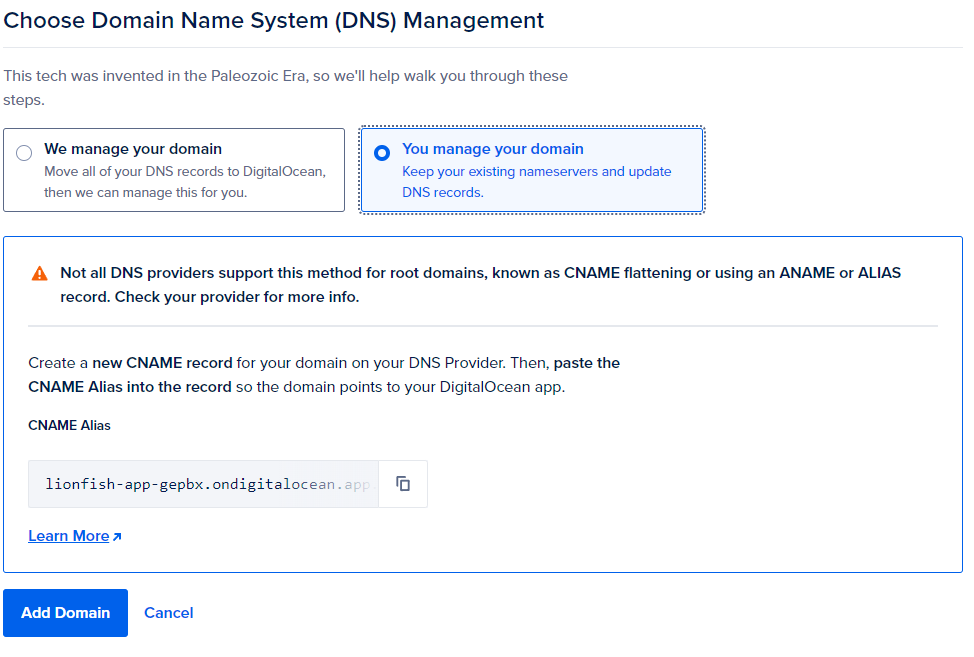
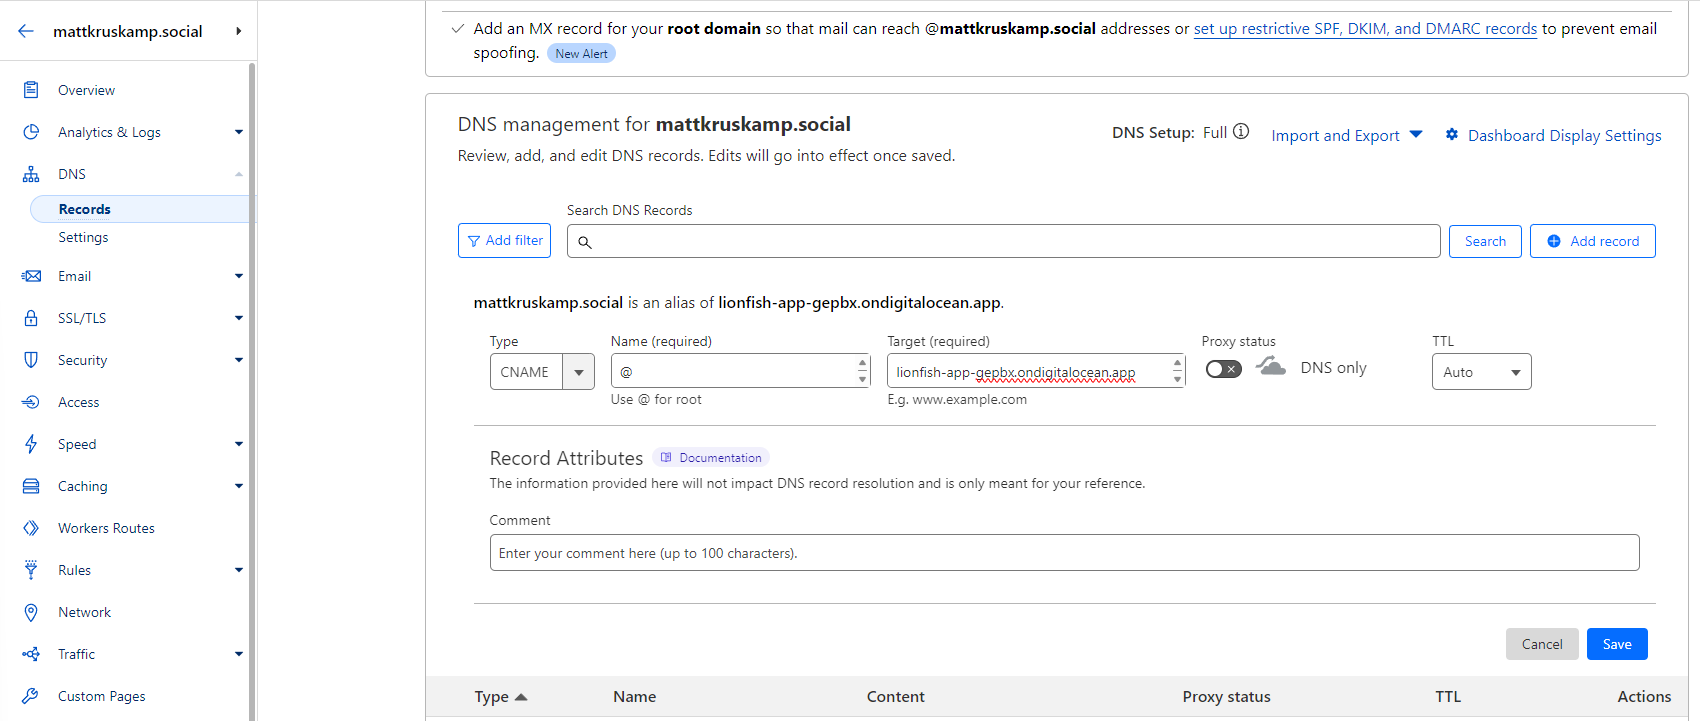
We have to set up the CNAME with Cloudflare to link them together. So, I opened another tab and went to the Cloudflare dashboard. Under the websites section, I selected the new domain. Then, I clicked the DNS records section and added the CNAME alias specified from Digital Ocean. I noticed when I copied from Digital Ocean that there was an extra period on the end of the domain, so I removed it. I turned off proxy status for testing, but I'll turn that back on because CloudFlare is awesome.
Then I went back to the Digital Ocean page, and clicked Add Domain. I waited for the custom domain status to change from pending.
Now I can go to mattkruskamp.social and see the site live!
Conclusion
That was a lot of effort, but now I can modify the site quickly and put it into production without manual processes. This article ended up much longer than I intended, so next time, I'll explain the code changes I made to customize the website.
Happy coding.